Caulking baseboards is a simple yet effective way to enhance your home’s appearance and functionality. As we explore in this comprehensive guide, baseboard caulking can be a valuable DIY project for homeowners looking to improve their living space.
We’ll walk you through the reasons to caulk your baseboards, the step-by-step process, and valuable tips to achieve professional-looking results. By the end of this article, you’ll be well-equipped to decide if baseboard caulking is the right choice for your home improvement needs.
Baseboard caulking is more than just a cosmetic fix; it’s a practical solution that can help seal gaps, reduce dust accumulation, and enhance the overall aesthetic of your home.
Benefits of Caulking Baseboards
Caulking your baseboards can significantly enhance your home’s overall appearance and functionality. By sealing the gaps between your baseboards and walls, you can achieve multiple benefits that improve your home’s comfort and efficiency.
Aesthetic Improvements
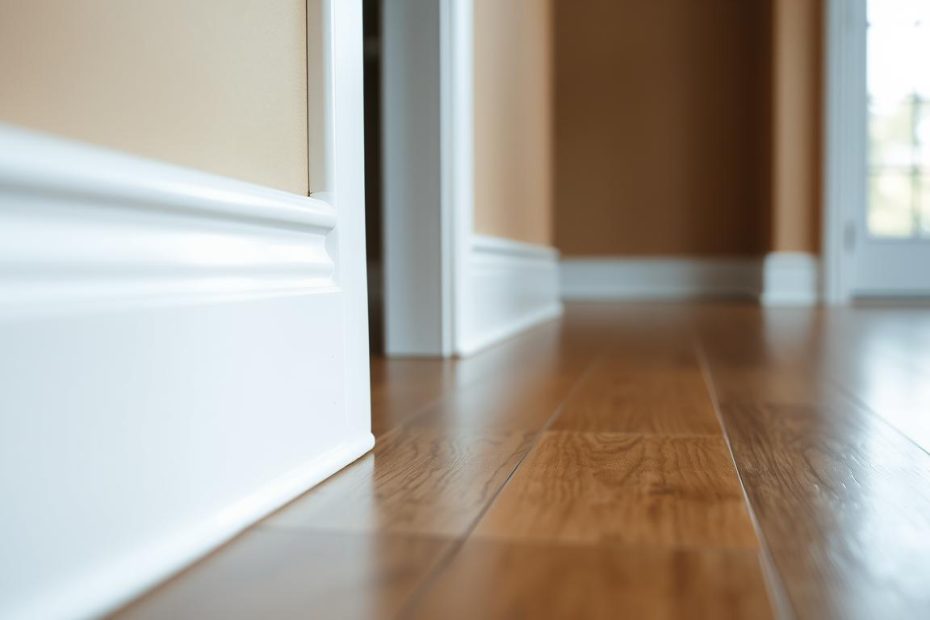
Caulking baseboards helps to create a seamless joint between the baseboards and the walls, enhancing the overall appearance of your rooms.

This simple task can make your home look more polished and well-maintained. It’s a straightforward DIY project that can significantly impact your home’s aesthetic.
Protection Against Moisture and Pests
Gaps between baseboards and walls can allow moisture to seep in, potentially leading to water damage or mold growth.
Caulking these gaps helps to prevent moisture intrusion, protecting your home from related issues. Additionally, sealing these gaps can prevent pests from entering your home through these openings.
Energy Efficiency Benefits
Caulking your baseboards can also contribute to your home’s energy efficiency. Gaps around baseboards can allow heated or cooled air to escape, increasing your energy bills.
By sealing these gaps, you can help maintain your home’s internal temperature, reducing the need for excessive heating or cooling.
| Benefits | Description |
|---|---|
| Aesthetic Improvements | Enhances the appearance of your home by creating a seamless joint between baseboards and walls. |
| Protection Against Moisture and Pests | Prevents moisture intrusion and pest entry through gaps between baseboards and walls. |
| Energy Efficiency Benefits | Reduces energy bills by preventing heated or cooled air from escaping through gaps. |
When Not to Caulk Baseboards
While caulking baseboards offers several benefits, there are situations where it might not be the best option.
For instance, if your baseboards are old or damaged, it might be more effective to replace them rather than caulking.
Additionally, if you’re dealing with a historic home, you might need to consider preservation guidelines before caulking your baseboards.
Should You Caulk Baseboards: Step-by-Step Guide
With the right tools and a bit of patience, caulking your baseboards can be a straightforward DIY task. Caulking baseboards not only improves the aesthetic of your home but also provides protection against moisture and pests, enhancing energy efficiency. In this guide, we’ll walk you through the process, from preparing the area to applying the caulk correctly.
Tools and Materials Needed
Before starting your project, gather the necessary tools and materials. You’ll need a caulk gun, caulk (preferably silicone or latex-based for baseboards), a damp cloth, and a utility knife or caulk removal tool for cleaning up old caulk.
| Tool/Material | Description | Importance Level |
|---|---|---|
| Caulk Gun | For applying caulk smoothly | High |
| Caulk | Silicone or latex-based for flexibility and durability | High |
| Damp Cloth | For wiping away excess caulk | Medium |
| Utility Knife/Caulk Removal Tool | For removing old caulk | Medium |
Step 1: Prepare the Area
Start by cleaning the baseboards thoroughly. Remove any dirt, dust, or old caulk using a vacuum cleaner or a damp cloth. If there’s old caulk, use a utility knife or caulk removal tool to scrape it off. Ensure the area is dry before proceeding.
Step 2: Choose the Right Caulk
Selecting the right caulk is crucial. For baseboards, silicone or latex-based caulk is recommended due to its flexibility and durability. Consider a paintable caulk if you plan to paint over it.
Step 3: Apply the Caulk
Load the caulk gun with your chosen caulk and cut the nozzle at an angle to control the bead size. Hold the gun at a 45-degree angle and apply gentle to moderate pressure.
Proper Angle and Pressure
Maintaining the correct angle and pressure ensures a smooth, even bead. Practice on a small area first to get a feel for it.
Working in Sections
Divide the baseboard into manageable sections. Apply caulk to one section at a time, ensuring you have enough to fill the gap but not so much that it spills over.
Step 4: Smooth and Finish
Use a damp finger or a caulk tool to smooth out the caulk, feathering it out towards the edges. Wipe away any excess with a damp cloth.
Common Mistakes to Avoid
Avoid applying too much caulk, as it can be messy and wasteful. Also, be cautious not to caulk over dirt or old caulk, as this can lead to a poor seal.
- Too much caulk application
- Not preparing the surface properly
- Not using the right type of caulk
Tips for Long-Lasting Baseboard Caulking
To extend the life of your baseboard caulking, regular maintenance is essential. We recommend inspecting your caulking periodically for signs of wear, such as cracks or gaps. If you notice any damage, touch up or reapply caulk as needed to prevent further deterioration.
Proper home maintenance also involves keeping the area around your baseboards clean and dry. Avoid using harsh chemicals or abrasive cleaners, which can damage the caulk. Instead, use a mild detergent and water to clean the area.
By following these caulking tips, you can enjoy the benefits of your baseboard caulking project for years to come. Regular upkeep will help maintain the aesthetic and functional benefits of your caulking, ensuring your home remains energy-efficient and protected against moisture and pests.